We have many ways to collect money in SwiftCloud, which are…
- Invoice / Estimate / Proposal / Receipt System
- Shopping Cart / SwiftShop / e-Store
- Landing Pages or Sales Page
- Signup-with-Product (i.e. Memberships)
- e-Sign In-Doc Mode “Sign & Pay” – integrated into an e-Sign doc, or doc-form like a setup or intake form, lease application, etc.
- Point of Sale (Cash Register / Tablet) is in Beta – designed for simple in-person needs.
- Credit Card on File / Offline Manual Charge Form
- Scheduler (Winter 2020; in beta now)
- Contact Detail >> Manual Charge with Virtual Terminal
- Coming Soon: Text-to-Pay: SMS Payments
Which is right for you depends on what you need. All have been built based on real-world use cases. Here we’ll talk about which is right for you, then link to the respective articles.
 As of writing, we currently support the following gateways:
- Stripe (works in 37 Countries: See List Here)
- (Several more are already in process – Paypal, ACH e-Check, and Authorize.net)
Over a dozen more are scheduled behind that; if you need one in particular reach out to us. Longer term we’ll add international gateways, pay-by-phone, and cryptocurrency.
NOTE: Before you can collect money on any of these methods, be sure to tell us how you want to get paid (connect your incoming-money account). Click the gear bottom left >> Edit Profile, scroll to the far bottom and click Financial Settings. You may need to re-authenticate. To connect this, Login, then go to https://crm.swiftcrm.com/user/profileFinancial
TIP: New User? Start here – you need a way to get paid first.
1. Invoice / Estimate / Quote / Receipt System
This is all one big system, best for when you want to invoice one client for one specific thing for which you already have basic agreement, or at least partial agreement on (i.e. a project estimate you have sketched out).
For more help on this, see https://swiftcloud.ai/support/invoice
TIP: The Quote system can be used in person too, or over the phone – you can assemble an order for someone, they’ll give you a card or tell you one over the phone, and charge the user right from on the page.
2. Shopping Cart
All accounts have a shopping cart system built in, which gets enabled as soon as you have at least 1 item for sale. To create a new item for sale, just click from your main drive-page the orange Add New >> SKU / Item for Sale.
TIP: An item for sale can be any service or product, and SKUs can be added into invoices.
3. Landing Pages
To create a new landing page, just either go to Main Drive >> Add New >> Video Landing Page, OR create a new doc, then in the far bottom … More Options section, in the top left area, change the Page Type to Landing Page.
Once you have a landing page, on the right side you’ll have a few options for CTA – Call To Action. What’s the next step you want the viewer to take? The options are form, payment, or schedule an appointment. If you click Payment, you’ll need to choose the item for sale (See #2 above, this is all one system).
4. Signup With Product
This is most typically used for membership, but could also be a complex sale in which you want the user to login to your Web Portal to complete a project, or access a LMS (Learning Management System) e-Course. This can also be a good choice for systems like a martial arts school or gym, because the user has greater login controls, and can proceed to more complex data flows.
How to use it: Simply link to….
https://portal.swiftcrm.com/register/?p={YOURPRODUCTIDHERE}
i.e. https://portal.swiftcrm.com/register/?p=210p6
Note product ID is always {userID}p{productID}.
TIP: You can brand this on your subdomain – i.e. https://Secure.YourDomainHere.com/register?p=123p456
This will automatically show your brand / logo / colors, if it’s your product. After the user signs up, we’ll follow whatever rules you have created in the product SKU – typically redirecting the user to a setup doc, karate school schedule, etc – some sort of fulfillment “what’s next” step.
5. Sign & Pay / In-Doc-Payment
Options: All payment options (same as other systems), and how much to charge has a few options
- Manual Input
- Select Product
- Hard coded / pre-defined
More details at Electronic Signature With Payment (Sign & Pay)
6. Point of Sale (Retail Mode)
This is a slow moving project, but the basics are already working. If you need it, let us know. This is designed for companies with not that many SKUs (products / services) – our #1 focus is on service industries.
That said, if you have a service business (school for ninjas, spa, auto mechanic) and some people show up in person, this is designed for you.
A Note on Recurring Billing
Any product with recurring billing set in the price-controls will cause recurring billing, as part of an “Agreement”. A landing page, shopping cart, in-doc purchase, etc – all systems we have – can create a recurring billing setup.
The same system we use internally is available to you for any recurring-billing business or organization. This can be online (SAAS Software as a Service, or any membership website), offline (gym membership, children’s daycare), or a hybrid (coaching business). For apartment rental, HOAs, or clubs, you can choose what payment methods to allow (i.e. online ACH e-Check only). This powerful system allows for offline payments (i.e. cash, wire transfer, snail-mail checks) or online, and will generate an invoice per terms even if payment fails.
When payments do fail (and about 9% per month will statistically, due to expiration or security concerns), the client can update payment and will still get notified.
7. Credit Card on File Form
This is just a web-form, but with some security features. It will not actually charge the client at time of submission.
This is useful for select industries (say, Cruise Ship sales, in which they bill the balance at 90 days before sailing), if you don’t actually charge the user until delivery or til success of some type (i.e. business financing based on amount funded), or if you want to keep a credit card on file (example: Web designers, agency services, attorneys – anyone with variable billing amounts).
TIP: We have in the templates library a “Credit Card on File” form.
8. Scheduler is in private beta.
If you need a scheduler, contact us.
9. Contact Detail >> Charge User.
In SwiftCloud, to see contacts, click the user icon very top left, then All Contacts, then find the person or company you’re looking for by searching. Once found, click their name.
TIP: You can search by name, company, phone, email.
From the contact-detail page, you can charge a user a manual amount, in addition to adding things to their account. You can also manage a client’s payment methods.
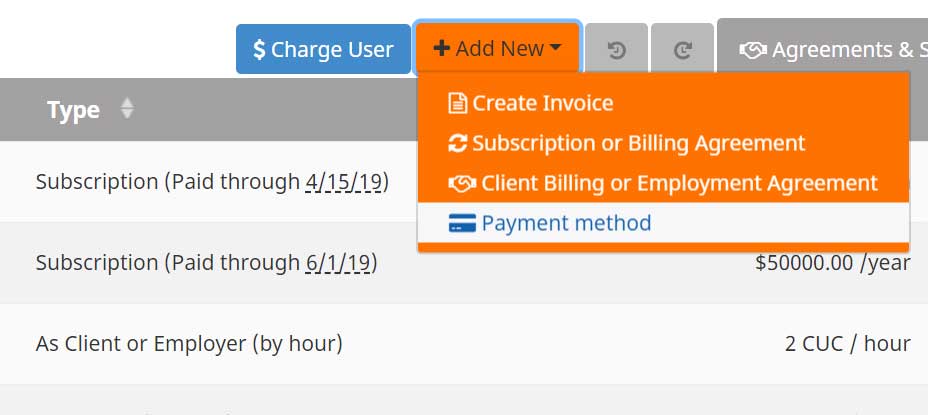
To get started, click the Accounting button at the far bottom, then either Charge User or Add New >> Payment Method

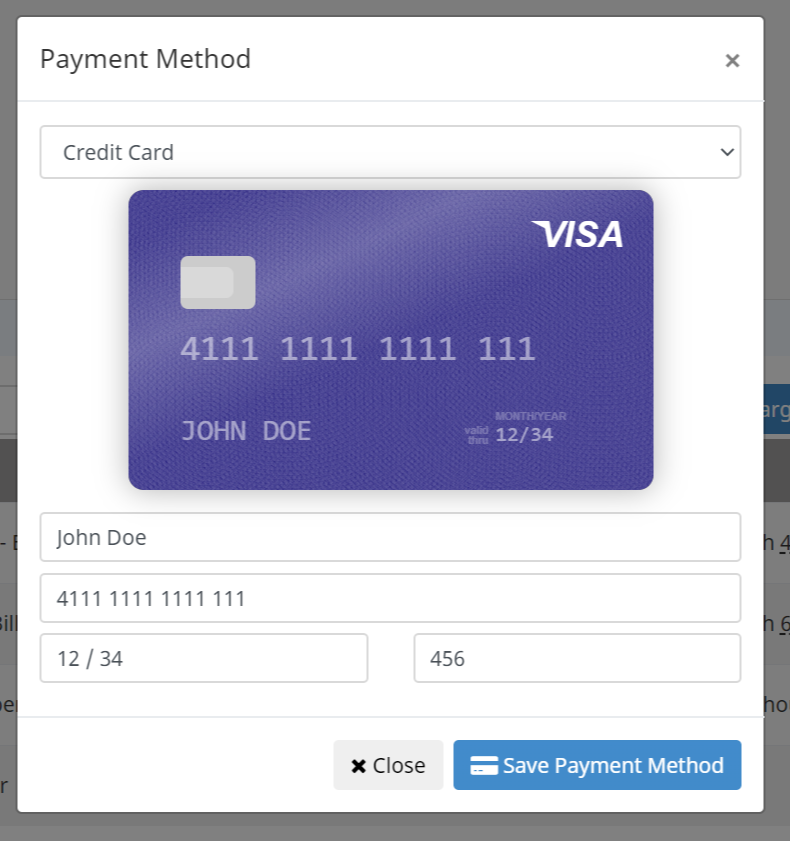
When you add a Payment Method, you’ll see a popup in which to store the client’s credit card, ACH bank data, and we’ll have other options in the coming months such as crypto (Bitcoin), pay by phone, etc.
Saving a payment method will do what you’d expect – it saves a card on file. Notice you have a dropdown at the top to save other payment options.

You can also of course then charge the user a manual amount or grab one of your SKUs (Stock Keeping Units, i.e. something you sell from your Order Book) if needed

