Invoice Setup & Quick-Start
- 1. Setup Payment Methods
- 2. Create Items (SKUs) & Invoices
- 3. Publish & Get Paid!
1. One-Time Setup: Getting Paid
How do you want to get your money?
We currently support Stripe, Paypal, Venmo, Cashapp & Zelle. If you need us to support some other gateway, reach out to us, and we’ll take a look.
A Quick Overview here…
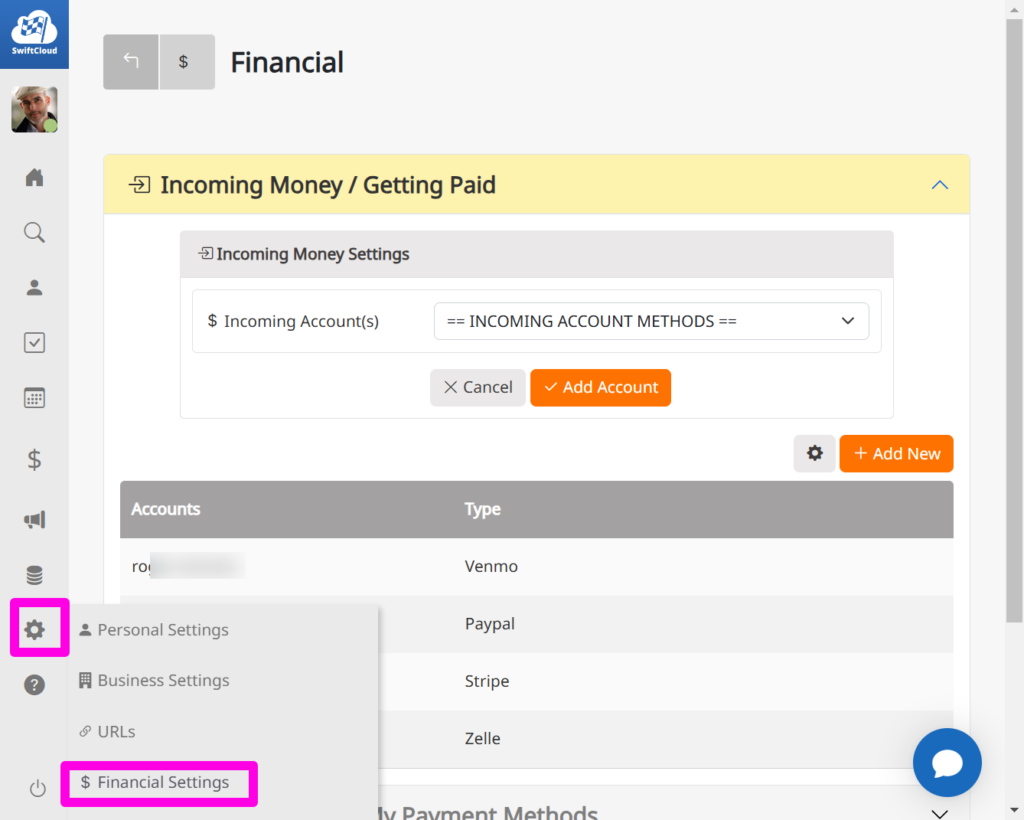
Once you’re signed up and / or logged in, head over to Settings >> Financial.
We most recommend Stripe.com, if you don’t have a strong opinion. Go there now and set up a free account – they have no recurring fees, and per-transaction fees are very competitive, about 2.7% + .25 (loose guess, varies by volume).
Fill in the payment method(s) you prefer.

2. Create an Invoice
Sell anything – services and / or products.
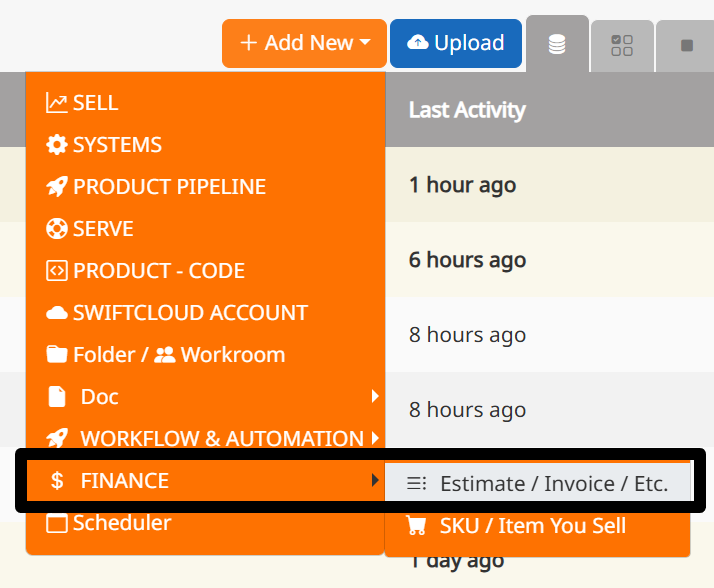
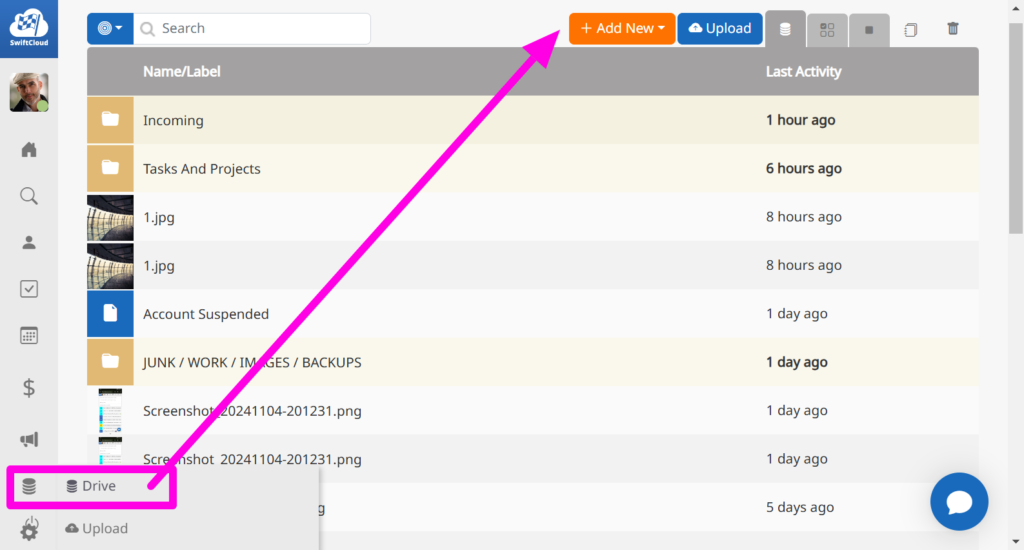
Once logged in, just click the main drive icon (bottom left), then click Add New – then drop that down to FINANCE >> Estimate / Invoice / Receipt.
Give it a title that makes sense for you. The client can see this FYI.


Note you can change the status anytime. Often a project starts as an estimate, is verbally committed and becomes an invoice (possibly with some revisions), then it’s paid in full or in part and becomes a receipt.
TIP: Clone any invoice quickly by clicking the Save Drop-Down…

Who’s Paying?
You have 2 options in the green box for the payor: to select an existing contact, or to add someone new.
Just click the + to define the payor.

Once you have your invoice created, click the green + to add rows to it.
If you have products (SKUs – aka items you sell, aka “Stock Keeping Units”), you can click the cart icon and add those.
If you have the Timeclock system set up, you can add hourly work too.
TIP: You can export Time-Rows from Timeclock into the Invoice for client-billing. For now, add the per-minute rate manually; we’ll soon roll out the “Agreements” system that has billing agreements for agency services.
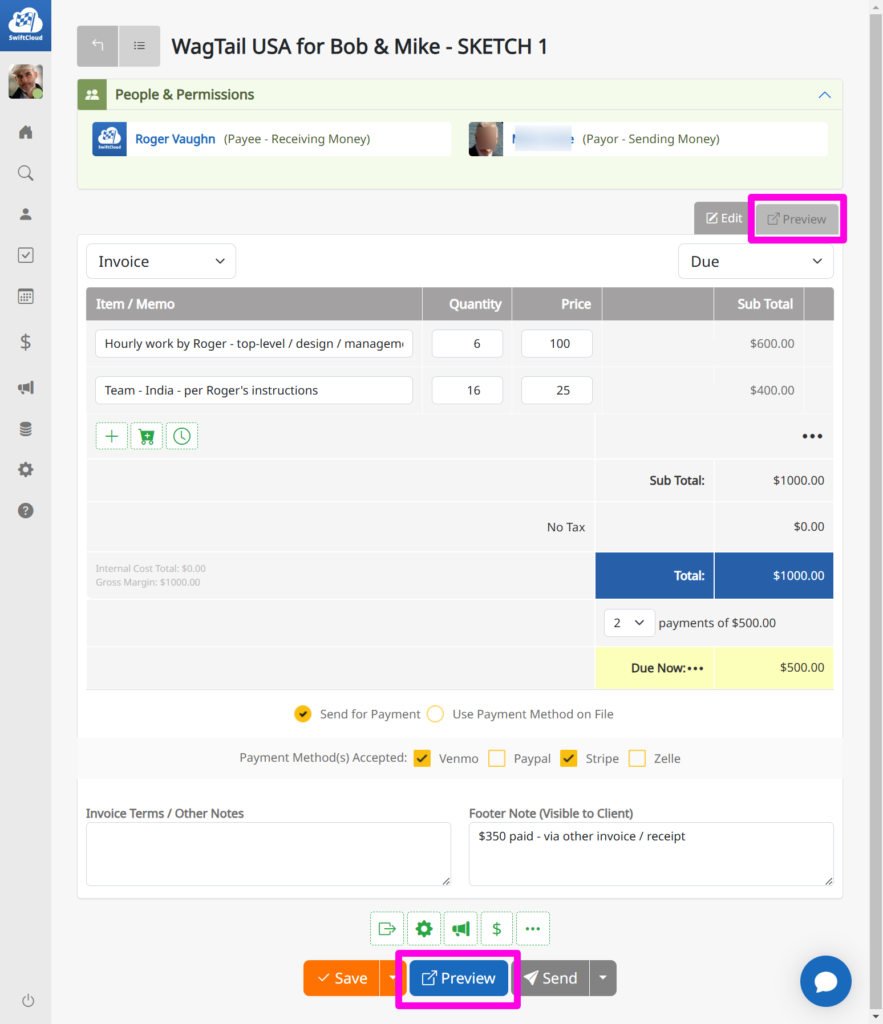
At any time click Preview in the top right (PINK) or bottom center (blue button) to preview and see your invoice.
In the top left, you can drop down Invoice anytime to other options (such as Estimate, Quote, Receipt, etc) and change the status in the upper right.
Pay special attention to the … options above Sub Total and after Due Now – these have special more advanced options for shipping, taxes, previous payments, installation, and account credits.
The lower one allows you to break up an invoice into payments.
Notice you can change the per-invoice pay-methods. If you have high-amount invoices, you may want to disallow credit cards for example due to fees.
NOTE: SwiftCloud does not charge any fees on top of 3rd party systems, at this time.

3. Get Paid!
Last – send it or present to the client.
Click the Send button to email it, or the dropdown for more options.

More Advanced Options
There are already live some options for Purchase Orders, Credit Memos, bundled invoices, variable payments.
Some of our future plans – let us know if you need ’em – include more payment methods, automated recurring invoice generation (for subcriptions, lease, rental etc) (with automated offset-payments typically), and better integration to accounting.
RELATED: Timeclock – for time-based billing, use the Timeclock system to log time, then create a Billing Agreement with that client, then export those time-records to create an Invoice.
The e-Docs system also has a timesheet function which can accomplish the same outcome – a record of billing for time.
ESTIMATES: Bundling Invoices into an e-Doc sales is in process via “Envelopes”; contact us for beta access.


