GOAL: 100% seamless for your customers – YOUR logo, your colors, even your domain.
We must be able to legally guarantee the contents of the signature, and for that reason, it must be on a server we control. That said, let’s make it nice!
Examples:
- SUBDOMAIN – like https://portal.YourDomainHere.com, https://Patients.DentistWebsite.com, https://Members.MyYachtClub.com, https://tenantportal.ABCManagement.com
- DOMAIN – like https://PlumbingJobs.com or https://YourMainDomain.net
// UPDATE DEC 2020: Root level domain mapping is not yet supported, but you can request it and we’ll let you know when it’s ready.
It can be anything you want.
Setup is 2 Steps:
- Point the Domain / Subdomain to SwiftCloud servers (using free CloudFlare below)
- Configure SwiftCloud to align to this domain.
You can setup
https://Subdomain.YourDomain.com
OR http://AnyDomain.com to map to SwiftCloud Servers.
Your portal(s) can be customized and show the features you prefer most relevant to your business.
The following is customized to you:
- Logo
- Background (color, image)
- Light or Dark text / theme
- Link back to your main site URL
UPDATE JUNE 2021: The below has broken, due to a change by Cloudflare, not us. We are investigating a new system. Please do not use the below at this time.
TO GET SET UP:
- Cloudflare is required (Free! and great – you should be using it anyway, it will reduce hacking, speed up your website, etc.).
- Once logged into Cloudflare, add your domain. It will ask you to change the nameservers. Do that. Wait about 15 minutes, and then it should work.. in 99.99% of cases, nothing will change – you won’t really notice anything, though your site will be (2a.) faster, once the cache is built, and (2b.) protected, from hackers, somewhat. This is one small part of info-security, but it can help against “DDOS”, etc.
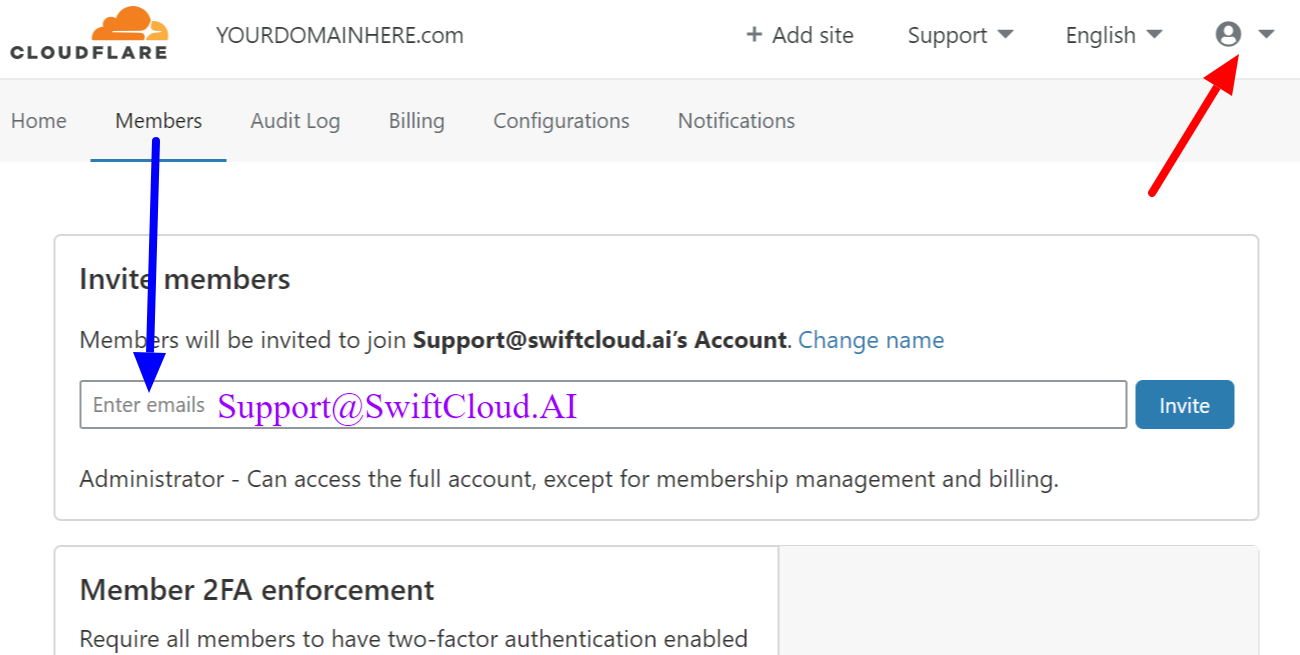
- Next, in the far top right, click the small user-person icon (Red arrow below)
Then click My Account
Then click Members - Add to us to your team – Support {at} SwiftCloud.AI – like below.
- Once you’re done, be sure to let us know – send us an email – we have to do some steps on our side. Currently, domain mapping is free for all clients, but we need to some small setup manually. You can also add us to your google chat at SwiftCloudHelp {at} gmail dot com. We need to know:
- Your account you want to map
- The domain or subdomain, just so we are 100% sure to get the right domain to the right account.
Want to set it up yourself, and fairly tech savvy?
Here you go.
NOTE: If you’re a client on any paid plan, we can do this for you – stop here. If you’re a SwiftCloud Certified Professional, or tech savvy, here’s the full process.
GOAL: Map any subdomain or domain to SwiftCloud.
NOTE: For below to work, you must have your domain on CloudFlare (free plan is fine), using 1 of 2 methods, i.e. point DNS OR transfer from your existing registrar (i.e. such as GoDaddy).
Steps in order:
- Login to CloudFlare.
- Click your domain.
- PART 1: Easy: Set the A Record
- Add an “A Record” for the subdomain in question; point it to your specific IP address. (Note this varies by data center; yours will vary).
- PART 2: CREATE A WORKER
- Go to Workers (top middle blue icons)
- Click Launch Editor
- Click Add Script
- Give it a name like SWIFTCLOUDYOURNAMEHERE – it’s just for you, but must be unique. It will not show to the public.
- Copy the text below in the grey box, and replace the yellow highlighted section with your SwiftCloud username.
- Click Save.
- Next you need to apply the worker – go back to the Workers dashboard, and click Add Route
- Add your domain followed by /* in the URL, and select your worker. It should look something like this:
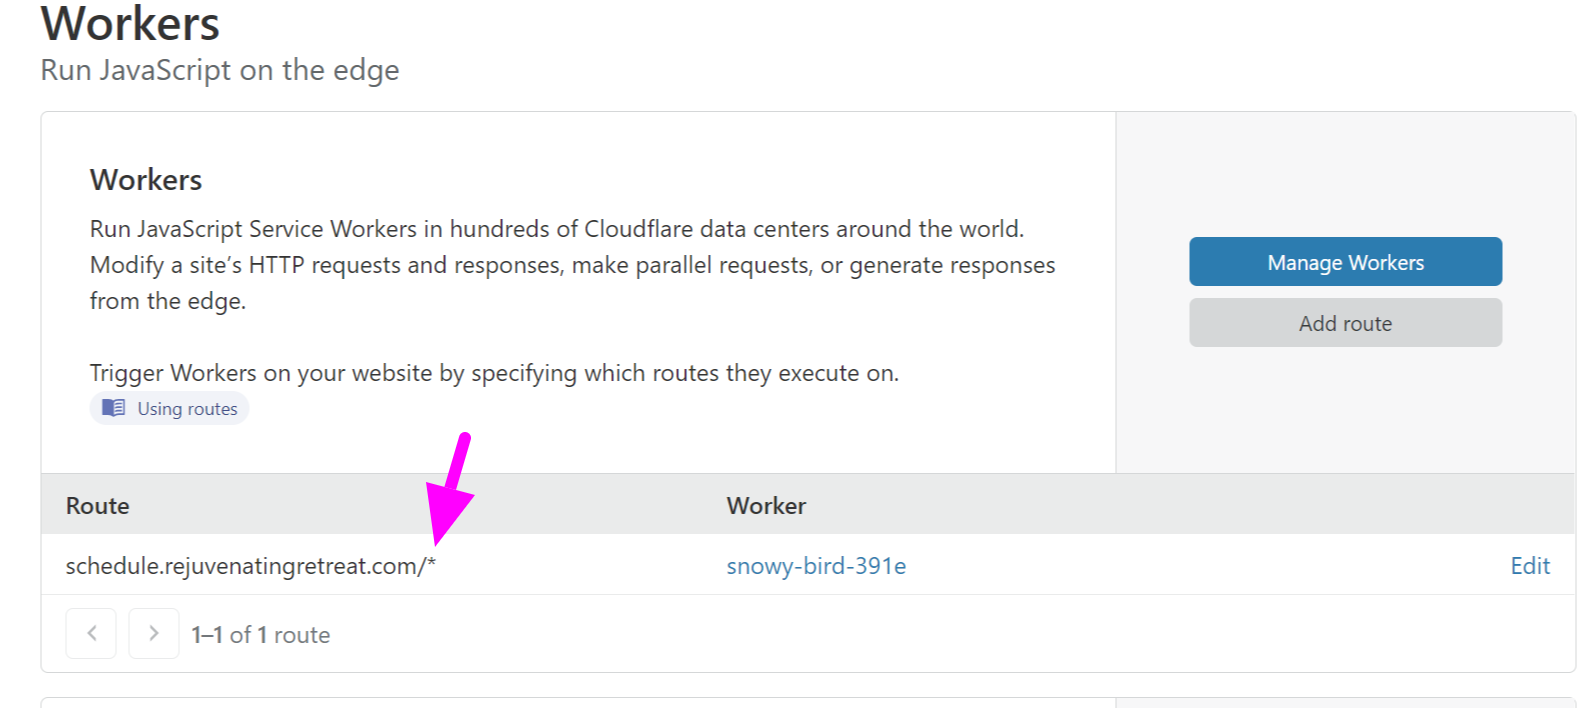
- Done!
NOTICE THE YELLOW HIGHLIGHTED PORTIONS BELOW.
That has to get changed to your username.
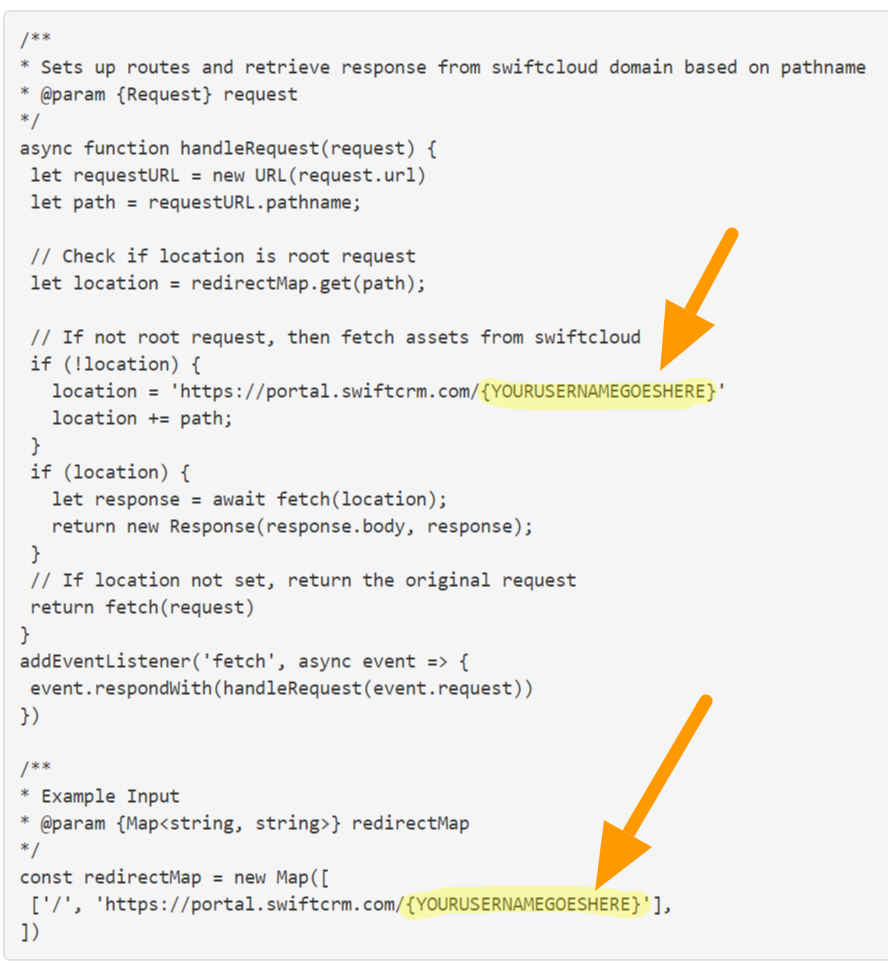
Here’s the code to copy and paste:
/**
* Sets up routes and retrieve response from swiftcloud domain based on pathname
* @param {Request} request
*/
async function handleRequest(request) {
 let requestURL = new URL(request.url)
 let path = requestURL.pathname;

 // Check if location is root request
 let location = redirectMap.get(path);

 // If not root request, then fetch assets from swiftcloud
 if (!location) {
   location = 'https://portal.swiftcrm.com/{YOURUSERNAMEGOESHERE}'
   location += path;
 }
 if (location) {
   let response = await fetch(location);
   return new Response(response.body, response);
 }
 // If location not set, return the original request
 return fetch(request)
}
addEventListener('fetch', async event => {
 event.respondWith(handleRequest(event.request))
})

/**
* Example Input
* @param {Map<string, string>} redirectMap
*/
const redirectMap = new Map([
 ['/', 'https://portal.swiftcrm.com/{YOURUSERNAMEGOESHERE}'],
])
LAST: CONFIGURE SWIFTCLOUD
Once done, you need to save some settings in SwiftCloud – easy.
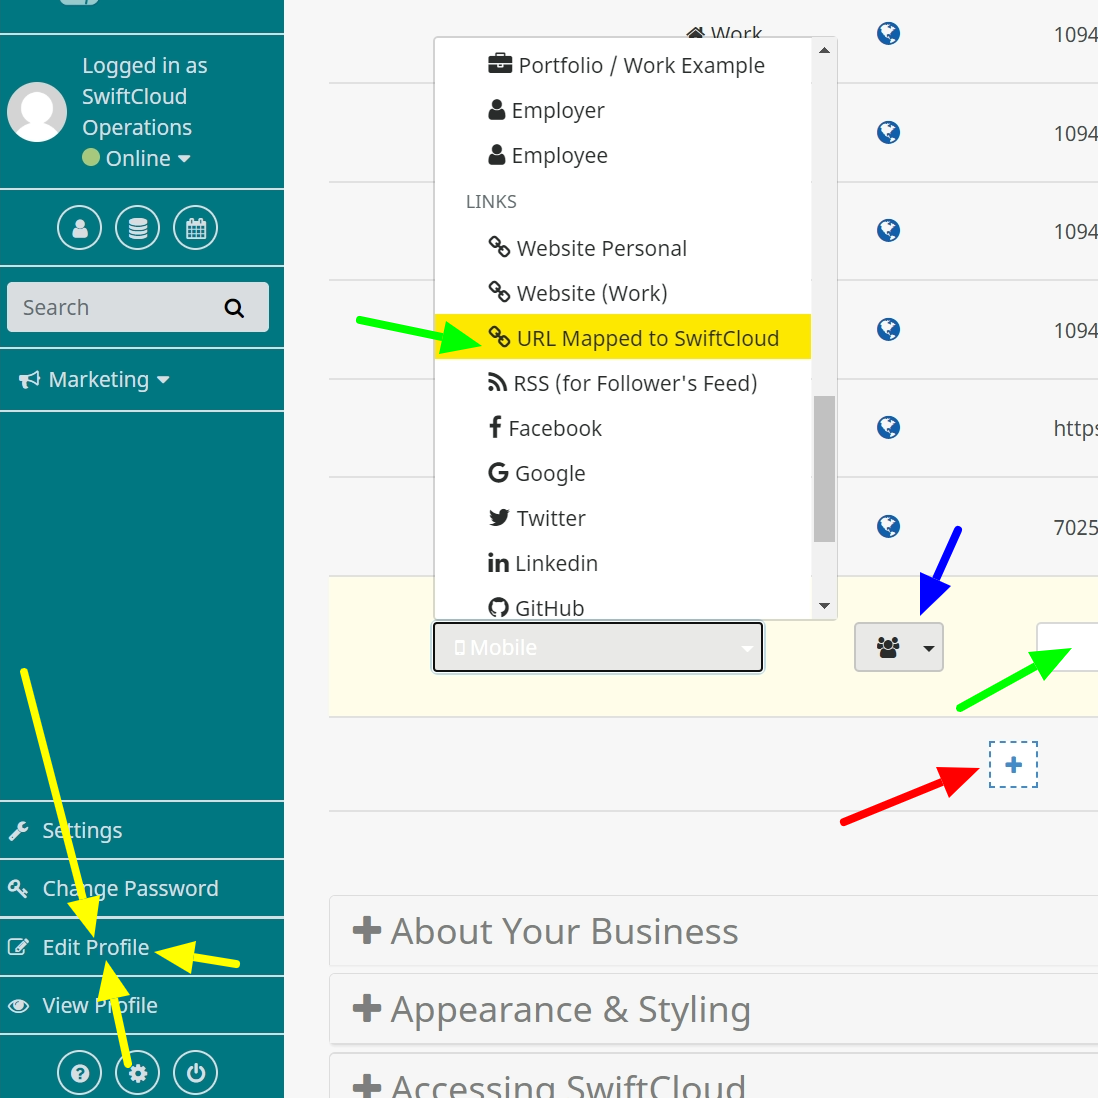
- From your main profile click, the Gear bottom left >> Edit Profile. (Yellow arrow above)
- Click the [+] to add a row to your data, and select “URL Mapped to SwiftCloud” (Red arrow above)
- Enter your domain or subdomain on the right (Green arrow)
- Done!
You can customize the root-level page and the top nav bar as well.
