Bulk Email broadcasting in SwiftCloud / SwiftCRM is easy, once you know where to look.
First, here’s the easy short summary:
- Import a CSV list of people / companies you want to contact
- Write the message you want to go out to them.
- Push the send buttons
- Later – give it some time – check your stats. Based on the actions people have taken (open, click), you can re-export into new groups.
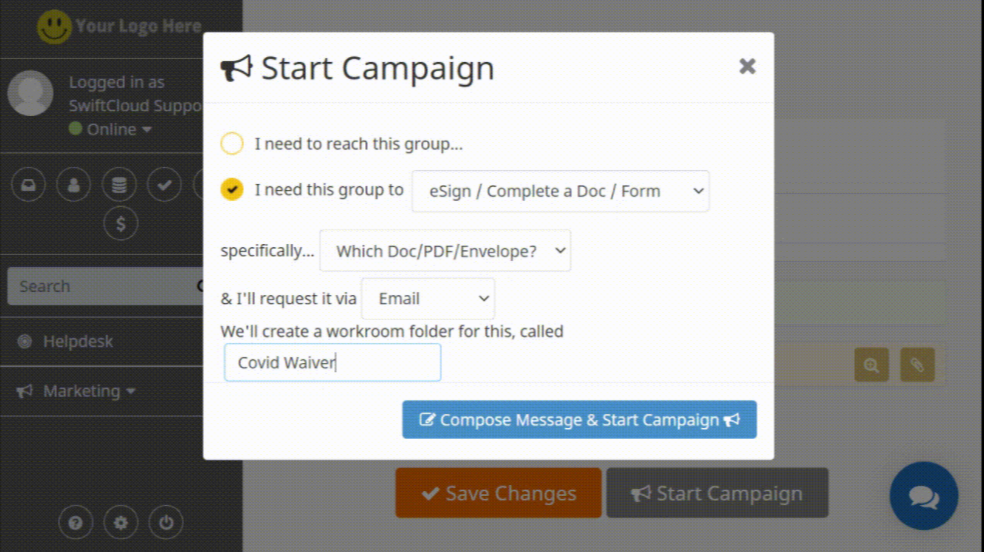
TIP: Need Bulk eSign, or to collect payment from a group, or get a group to schedule individual appointments? You can do that from here as well.
To send a bulk email, you need a group to send it to.
Start simple. Later, you can get fancy and add more powerful systems like lead scoring, customer segmentation, etc.
Let’s dive in: First is getting the Group into SwiftCloud / SwiftCRM.
Working with Groups in SwiftCloud / Swift CRM
First, go here…
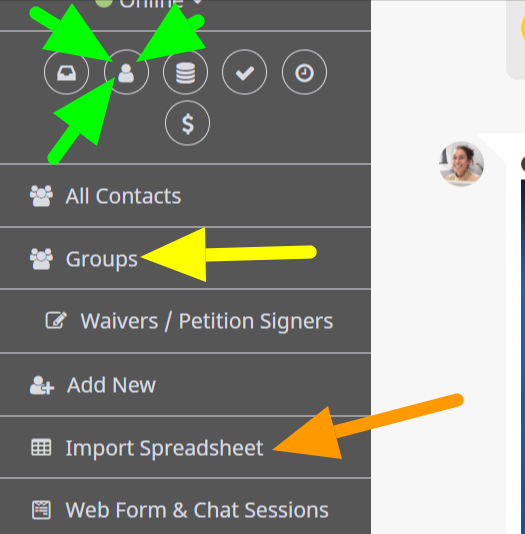
- Get logged into CRM.SwiftCRM.com
- Click the Person icon in the far top left (RED)
- If you want send to an existing group, click Groups (YELLOW)
- If you don’t yet have any groups, click Import Spreadsheet (ORANGE) to import a CSV (your list-source).
NOTE: These need to be people with whom you have a relationship, and/or you need to comply with spam laws. This will trash your IP address and server reputation, not ours, if you spam people off-topic and irrelevant messaging. Spam compliance is outside the scope of this help article; you can legally cold email to businesses, but you need to be careful and check some details and honor opt-out requests. We do check spam compliants and will block your account if it exceeds .7% (fairly strict).
RELATED: Working with SwiftCloud Contacts – notice the small groups icon next to it.
FEB 2021: Currently, imported spreadsheets should be exactly Name, Phone, Email. We’ll improve the CSV importer soon to allow custom columns / fields, etc., but for now, use this format.
Next, give it at least 1 tag and a name.
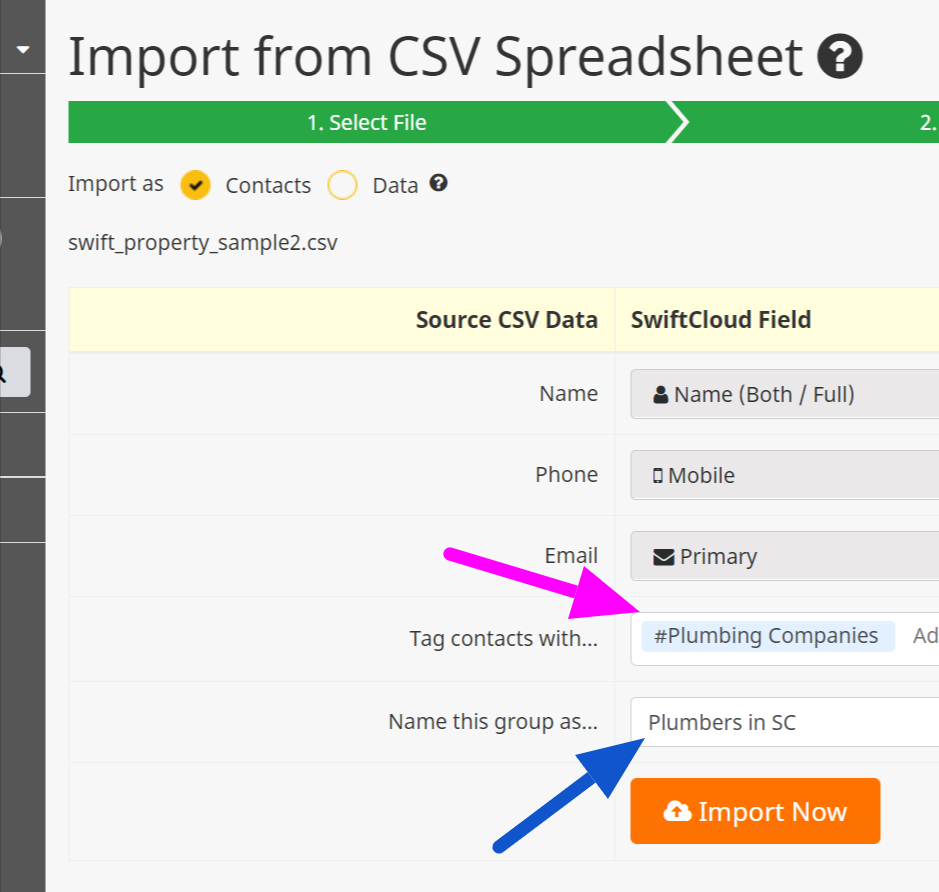
Click Import Now.
SwiftCloud will start processing your data so you can work with it, so if you have a large list, this may take a moment – give it some time, grab some coffee, and when you return you should see it in your list of Groups

To work with the group, click it – just click the title.
Once you do, you’ll see a list of people / contacts / companies. In the far bottom right, click the blue chat icon to open the communication dock.
OR you can click Start Campaign – the grey button at the bottom for more options.
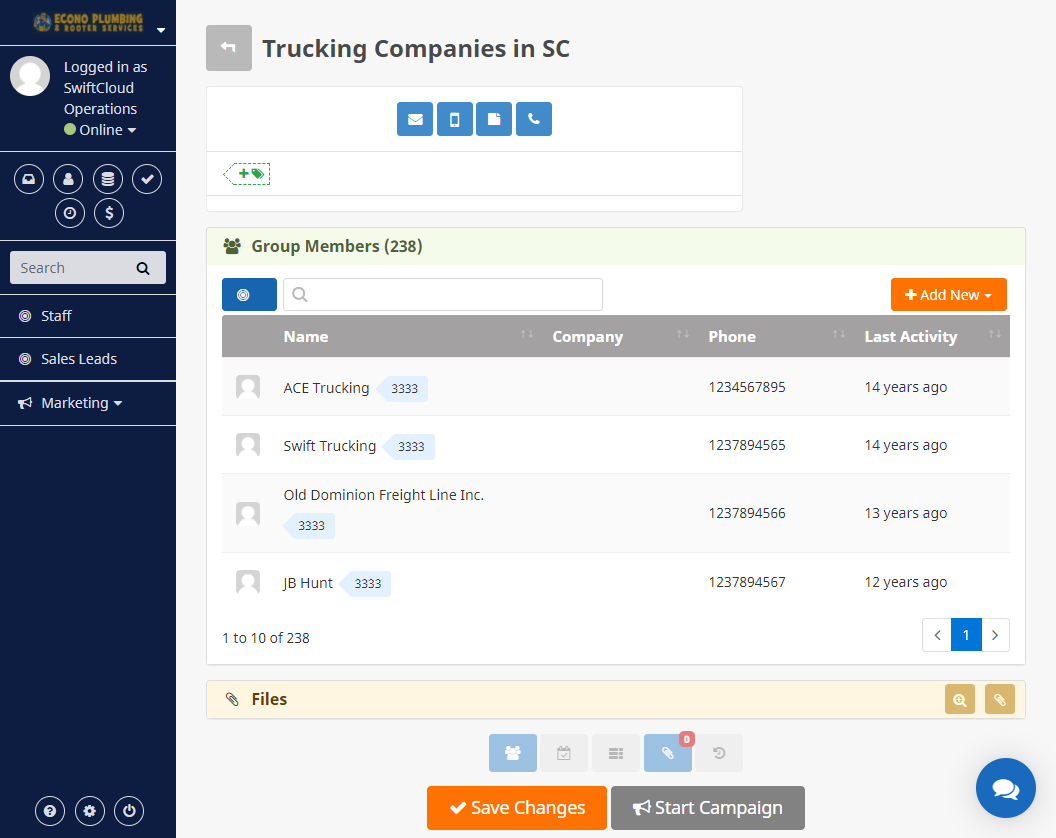
NOTE: When you create a campaign, we’ll take a snapshot of the group as it is now, then use that, and add that into a Workroom inside the Files section. We do this because group membership may change – people can be added or removed anytime, but we need to track the stats based on the group as it stands now.
You will be able to see the stats – such as who signed a doc or didn’t, who clicked or didn’t, etc – then re-export a new campaign-group if needed – from within files. All that will be stored inside that 1 workroom, which is then attached to this group.
If you click compose, you’ll see the buttons adapt on the fly based on your entries. Fill that out, and you’ll have a chance to compose the message before it goes out.
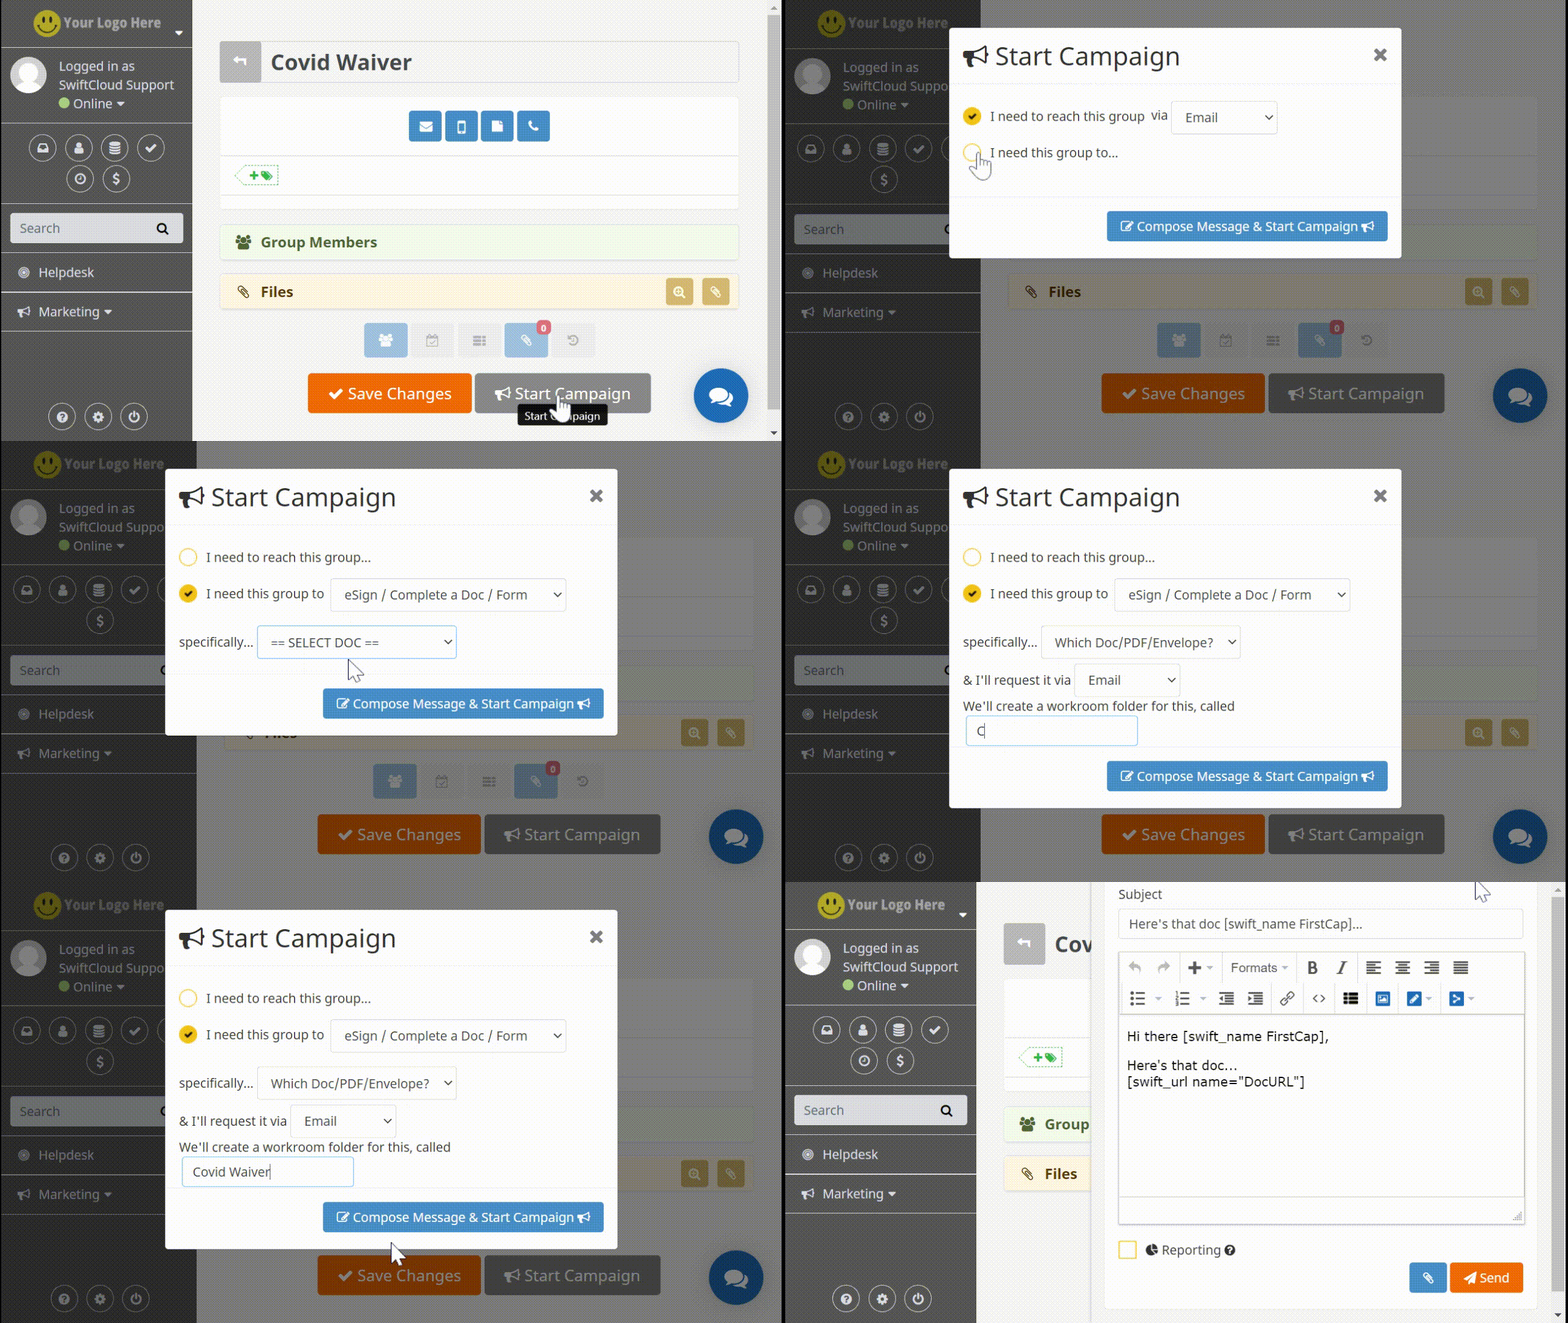
Once you run this wizard, back in your groups, you’ll see a link in the files section… that’s the workroom for that specific campaign, which is linked to this group, but technically separate.
Click it to see any stats…
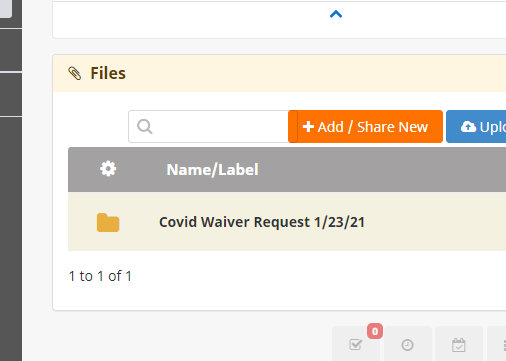
If you click it, you’ll see a link to at least 1 spreadsheet… here you can see details of your request. Note this is a snapshot of the group, and so you cannot add to it or subtract from it, though you can cancel the campaign and start a new one (generate a new snapshot).
![]()
In the near future we’ll have automated tools to export non-responders into a new campaign – it’ll be right in the bottom of that spreadsheet.
As usual, if you have any questions about this, let us know and we’ll update this entry.
UPDATE: Dec 2021: Added to CSV importer was tags (so you can tag individual contacts separately now, in addition to tagging all group-members), notes.
Also added was Reporting, so you can see clicks, opens, etc – in the history button

