We have a new option on e-signable PDFs, designed for fixed width spaces – the little boxes style often found in official government forms.
Here’s how to use it – it’s very easy, once you know where to look…
First, add a field as usual by clicking the orange box. This is after you have uploaded a PDF, and clicked yes when it asks if you need it converted for electronic signature.
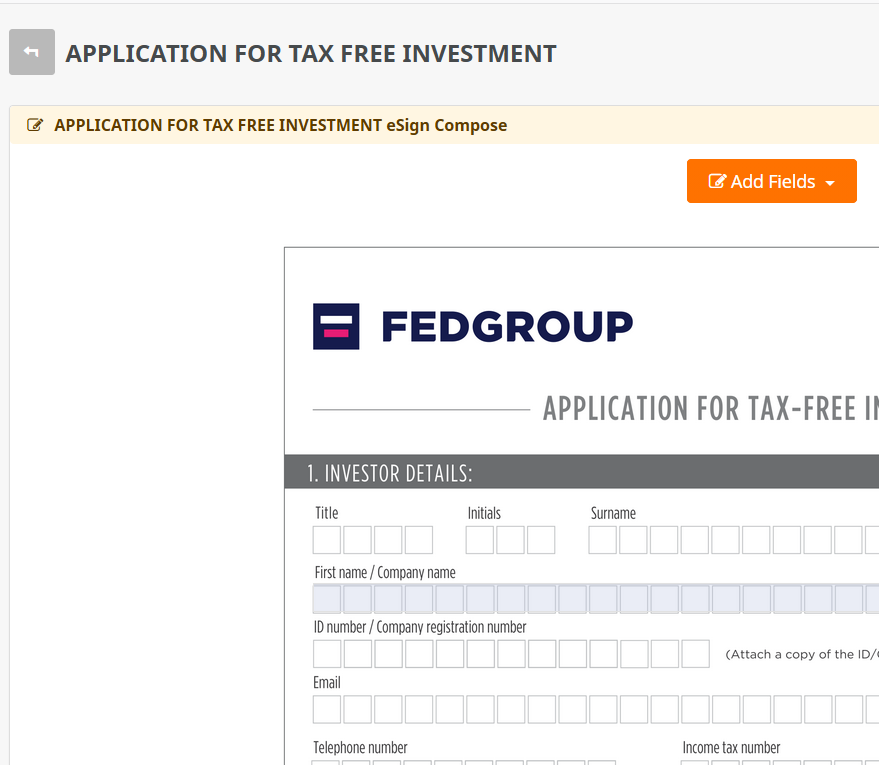
Note if you click “reserved field” options like name, phone, email, we already know what they are, and you cannot change the field-name, so by default we simply drop the field into the page. The popup will not automatically appear.
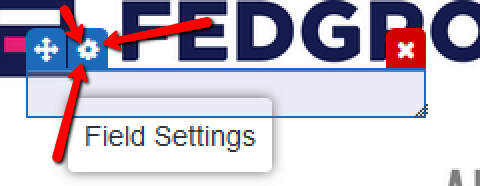
To solve that, just click the tiny gear icon that appears when you hover the field, before or after you drag it into place:
Once you do, you’ll see some options like so….
Click “Fixed Spacing”, and you’ll see a spacing-amount appear. 23 is a good default, but you may need to adjusted it, and potentially the font size below it, depending on your source doc.
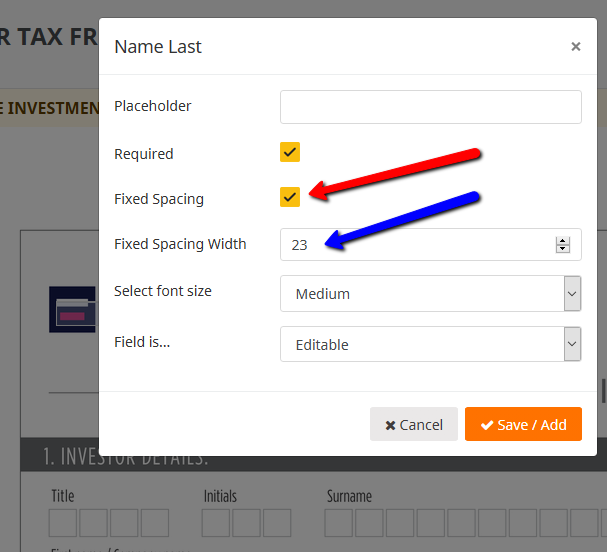
Once done, click Save / Add
Remember to click the big orange Save button at the far bottom of the page. Our system periodically auto-saves, but we don’t want you to lose any work.
Just repeat for the other fields as needed, and you’re set.
Note for general info – like text boxes, etc. you’ll see the popup before it adds the field, because we don’t know what that info is. Generally you want to name your field something helpful, but with no spaces.
This can also help with automation and data flows to other systems.
As always, if you have any questions or concerns about this feature, contact us, and we’ll update this help file.
